Please, rate the engine Author: warezcrackfull on 14-01-2024, 02:35, Views: 0
Respected Sites
Survey
Ads
Latest Warez


")


Ads
Warezcrackfull.com » Tutorial » Craft Gps Masterpiece Step By Step Using Esp32 – 2024
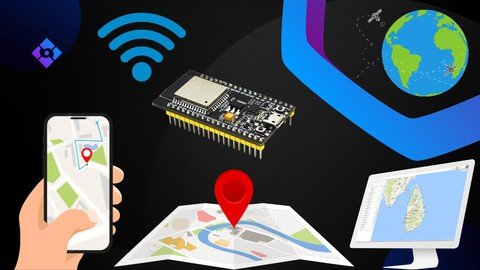
Craft Gps Masterpiece Step By Step Using Esp32 – 2024
Free Download Craft Gps Masterpiece Step By Step Using Esp32 – 2024
Published 1/2024
MP4 | Video: h264, 1920x1080 | Audio: AAC, 44.1 KHz
Language: English | Size: 2.61 GB | Duration: 3h 39m
Utilize the Full Power of HTML, CSS, jаvascript and C++ for Developing a Personalized ESP32 GPS Dashboard | No 3rd Party
What you'll learn
Delve into the critical role of a custom web dashboard for efficient GPS data tracking, laying the project foundation.
Address integral hardware and software requirements, ensuring a well-prepared mission.
Gain a profound understanding of GPS and its principles for effective module implementation.
Shift focus to practical GPS module setup and testing in the Windows Environment.
Explore ESP32 board integration with Arduino IDE, mastering functionality and validating performance.
Introduce the OLED Display module, unraveling its inner workings for visual data representation.
Integrate Firebase as a real-time database and Mapbox for map visualization to complete the core workflow.
Test all hardware modules and proceed to assemble them into one circuit.
Craft backend C++ code for transmitting GPS data to Firebase and displaying on the OLED for user experience.
Explore frontend development, bringing the interface to life using Python, HTML, CSS, Bootstrap, and jаvascript.
Learn about PythonAnywhere, a Python-based web hosting provider.
Deploy the complete project on the server for global browser access.
Address Firebase's payment limitation by developing an App Script code for GPS data storage in Google Sheets.
Witness real-time project output, observing live data acquisition, web dashboard display, and Google Sheets insertion.
Requirements
Basic programming knowledge is recommended for this course to ensure a smooth learning experience.
Ensure that you have a laptop or desktop equipped with reliable internet connectivity.
Description
I would like to introduce you to a brand new online course where you can learn to create a personalized web dashboard that empowers you to monitor the real-time location of your lost vehicle or person with detailed information. Even if you want to measure the distance and direction of the lost vehicle from your current location, it will also display the same. Let me show you the demo of this innovative project.How this course is completely different from all other courses? What sets this course apart from others is its distinct approach. Unlike many courses that rely on 3rd party IoT dashboards, where coding is limited to extracting data from the GPS and then sending it to the 3rd party IoT dashboard for visualization. So you learnt primarily the backend coding, the database and the frontend is handled by pre-existing IoT platforms. By following this approach the learning is almost zero. Whereas, our course takes a comprehensive approach to full stack development. This means you will be personally crafting the entire backend using C++, and write the code to send all the acquired data to the realtime database. Upon completing these two phases, you will start designing the frontend using HTML, CSS, jаvascript, Bootstrap and Python. Here are four main reasons, why you should take this course.1. Custom Dashboard - By building your own dashboard, you'll have complete control over its design and functionality. You can tailor it precisely to your needs, ensuring a unique and customized user experience.2. Unlimited Access - Unlike most IoT dashboards that offer only trial accounts with limited features, this course empowers you to overcome such limitations. Your project won't be constrained by server restrictions or data access. You'll have the freedom to track data as you please, ensuring your project remains fully accessible and functional.3. Full Stack Developer Experience - Through this project, you're not just learning a few coding techniques, but you're actually building a full-stack project from scratch. This valuable hands-on experience is incredibly beneficial, especially for aspiring full stack developers. The skills and knowledge you gain from this course will be directly applicable to real-world scenarios and could significantly enhance your job prospects in the field.4. Offering to Clients - If you're a developer aiming to provide this solution to clients, you can fully customize and tailor the project to their specific requirements. This course grants you the capability to be the master developer, offering a solution that's both powerful and versatile for a wide range of scenarios.I have always been a firm believer in learning by doing, and in this course, you will learn what you need to know by hands-on experience. You don't need any special knowledge except basic computer skills to get started with this course. Every one of you comes from a different background and hence the course is crafted from basic to advanced level with minute detail in every lecture.To make the learning curve easier, the course has been divided into 9 sections. Then, let us see what we are going to learn in each section.In the first section, we will understand the project concept and establish a strategic approach for its development. Thereafter, you will get to know the complete list of hardware and software requirements along with a clear understanding of the specific purpose each module serves in the project. Progressing further, we immerse ourselves in a comprehensive understanding of GPS and its underlying principles. In the second section, we shift our focus towards the practical setup and testing of the GPS module. We will get to know how to assemble the GPS module as per the circuit diagram, and then test the newly purchased GPS module under windows environment. By doing this test, we will be sure that our GPS module is functioning properly and we can move ahead in the project. And, in case the test fails, you can simply request a replacement of your GPS module.The third section takes us to the testing of our ESP32 board, a critical component in our project architecture. In order to test this board, we will first install the Arduino IDE, which is a widely recognized code editor that serves as a launching pad for deploying programs to the board. And, then add the required board manager library to integrate our ESP32 board. Upon successful integration, we will write our own code to test the functioning of our ESP32 board. By doing this, we will be assured that our newly purchased ESP32 functions properly. In the fourth section, we will be testing the last module of our project, the OLED display. Our exploration begins with a deep dive into the OLED display's mechanics and operations. Following this, we will delve into the circuit diagram, illustrating how to seamlessly connect it with ESP32. Once the assembly is over, we will program the OLED module to display the required message. By performing this test we will be assured that our OLED display module is fit for the project or not.Upon successfully completing all the hardware modules test, we will begin the fifth section with Firebase and Mapbox. We will first understand the role of firebase in our project, and then walkthrough the account creation and configuration of the real-time database. Upon completing this, we will progress to the next phase, focusing on Mapbox. We will explore the platform in detail and navigate through the account creation process, setting the stage for api access and configuration. In the sixth section, we'll start working on the backend. First, we'll figure out how to put together all the hardware modules to design the circuit for the backend. Then, we'll write a program to get all the GPS data from the connected module and send it to the Firebase for real-time display. To make it more user-friendly, we'll also show selected GPS data on the OLED Display module.The seventh section of our journey delves into the realm of frontend development, where the user interface and interactivity of the project come to life. We will begin with Python source code, understanding what it does and why it's important. After that, we will be understanding the HTML source code's interplay with CSS and jаvascript. These elements play an important role in enhancing interactivity and ensuring that our web application functions seamlessly. This section equips us with valuable insights into running the web server, rendering HTML files using Flask, and employing bootstrap, CSS and jаvascript to manipulate elements, ensuring a visually appealing and highly interactive web interface.The eighth section of our expedition delves into the practical aspect of deploying our project on an online server. Our objective is to ensure that the project is accessible from anywhere, fostering convenience and accessibility. To achieve this, we will walkthrough the process of choosing the best free Python based hosting account and then uploading all the frontend source code to the platform. As our goal is to build a completely free web application, we're utilizing a free Firebase account for the database. But, if we need to store these real-time data permanently, an upgrade to a paid Firebase plan with a recurring fee is necessary. So, as a developer, we should always find a way to fix these types of hurdles. Hence, we will be writing our own app script code to fetch all the upcoming data from the firebase and store them into Google Sheets. This approach ensures that all valuable GPS data is meticulously organized in a tabular format, providing a robust data repository that can be harnessed for various purposes in the future.In the ninth section, we'll reap the rewards of our efforts. We will see the live demonstration of our project. Here, we will witness the complete project workflow, commencing with the backend data acquisition phase, where the ESP32 board seamlessly retrieves GPS data and transmits it to Firebase for real-time display.On the frontend, we observe the retrieval of all the Firebase data, which are seamlessly displayed on the web dashboard. Simultaneously, we monitor the real-time insertion of data into Google Sheets every minute. This section serves as a testament to the successful execution of the entire project, showcasing its real-time capabilities and practical functionality.In the final moments of our journey, we step back to take a panoramic view of the comprehensive project we've collectively constructed. So we will walk through the summary of the entire project.Each video in the course will teach you new concepts and techniques which you may apply to any of your projects immediately. This course assumes just a basic knowledge of programming, and you can leave the rest to us. So if you are somebody who has never built a web based project before, you need not to worry, I will be with you every step of the way.Don't let technical errors hold you back from achieving your goals. If you ever need help, simply post your question in the question and answer section and our dedicated support team will get back to you within 24 hours. They are available to assist you 6 days a week, from Monday to Saturday.We will also share the complete source code with you, so that you can easily replicate the project and deploy it immediately.All lectures are accompanied by English subtitles, ensuring clear and comprehensive understanding. Also if you don't like the course, don't worry at all, you are always protected by 30 days, no questions asked, money-back guarantee. Alright, so at the end of the day, you have got nothing to lose, so join me in this incredible journey into the world of web development.Take control of your career and invest in your future. Don't miss the opportunity to improve your skills. Enroll now and take the first step towards a better future.
Overview
Section 1: Introduction
Lecture 1 Project Concept
Lecture 2 Hardware and Software Requirements
Lecture 3 Document - Hardware and Software Requirements
Lecture 4 Introduction to GPS and its Working Principle
Section 2: Testing GPS Module
Lecture 5 Introduction to NEO6M GPS Module
Lecture 6 Understanding the Circuit Diagram to Test GPS Module in Windows
Lecture 7 Circuit Diagram - Testing GPS Module in Windows
Lecture 8 Setting up GPS Module in Windows
Lecture 9 Testing GPS Module in Windows
Section 3: Setting Up and Testing ESP32 in Arduino IDE
Lecture 10 Connecting and Verifying the USB to UART Chip in ESP32
Lecture 11 Arduino Installation
Lecture 12 Setting Up ESP32 in Arduino IDE
Lecture 13 Testing the ESP32 Board - Part 1
Lecture 14 Testing the ESP32 Board - Part 2
Lecture 15 CODE - Testing the ESP32 Board
Section 4: Testing OLED Display
Lecture 16 Introduction to the OLED Display
Lecture 17 Understanding the Circuit Diagram for Testing OLED Display
Lecture 18 Circuit Diagram - Testing OLED Display
Lecture 19 Understanding the Source Code for Testing OLED Display
Lecture 20 Code - Testing OLED Display
Lecture 21 Output - Testing OLED Display
Section 5: Firebase and Mapbox
Lecture 22 Introduction to Firebase
Lecture 23 Account Creation and Setup of Firebase
Lecture 24 Introduction to Mapbox
Lecture 25 Account Creation on Mapbox
Section 6: Backend
Lecture 26 Understanding the Circuit Diagram for GPS and OLED Connection with ESP32
Lecture 27 Circuit Diagram - GPS and OLED Connection with ESP32
Lecture 28 Understanding the Source Code to Send Data from ESP32 to Firebase - 1
Lecture 29 Understanding the Source Code to Send Data from ESP32 to Firebase - 2
Lecture 30 Understanding the Source Code to Send Data from ESP32 to Firebase - 3
Lecture 31 Understanding the Source Code to Send Data from ESP32 to Firebase - 4
Lecture 32 Installing all the Required Libraries
Lecture 33 CODE - Send data from ESP32 to Firebase
Lecture 34 Uploading Backend Code on ESP32
Lecture 35 OUTPUT - Backend Code
Section 7: Frontend
Lecture 36 Understanding Frontend - Part 1
Lecture 37 Understanding Frontend - Part 2
Lecture 38 Understanding Frontend - Part 3
Lecture 39 Understanding Frontend - Part 4
Lecture 40 Understanding Frontend - Part 5
Lecture 41 Understanding Frontend - Part 6
Lecture 42 Understanding Frontend - Part 7
Lecture 43 Understanding Frontend - Part 8
Lecture 44 Understanding Frontend - Part 9
Lecture 45 Understanding Frontend - Part 10
Lecture 46 CODE - Frontend Code
Section 8: Making Project Live on Server
Lecture 47 Choosing the Right Hosting Provider for the Project
Lecture 48 PythonAnywhere Account Creation & Configuration
Lecture 49 Uploading Project Files on PythonAnywhere
Lecture 50 Limitation of Firebase Free Account
Lecture 51 Understanding the Code to Save Firebase Data to Google Sheets - 1
Lecture 52 Understanding the Code to Save Firebase Data to Google Sheets - 2
Lecture 53 Setting up the App Script Code in Google Sheets & Creating the Trigger
Lecture 54 CODE - Save Firebase Data to Google Sheets
Section 9: Final Project Output
Lecture 55 The Output of the Final Project
Lecture 56 Summary
This course has been specifically designed with beginners in mind, making it accessible to individuals with basic knowledge of computer science.,Whether you are just starting out or have a foundational understanding of the subject, you can confidently enroll in this course.,Our curriculum takes into consideration the needs of learners at various skill levels, providing clear explanations and step-by-step guidance to ensure a smooth learning experience for everyone.,Don't hesitate to join, as this course is tailored to support your learning journey from the ground up.
Homepagehttps://www.udemy.com/course/code-your-own-gps-dashboard-step-by-step-using-esp32/
Buy Premium From My Links To Get Resumable Support,Max Speed & Support Me
Rapidgator
juohh.Craft.Gps.Masterpiece.Step.By.Step.Using.Esp32..2024.part1.rar.html
juohh.Craft.Gps.Masterpiece.Step.By.Step.Using.Esp32..2024.part2.rar.html
juohh.Craft.Gps.Masterpiece.Step.By.Step.Using.Esp32..2024.part3.rar.html
Uploadgig
juohh.Craft.Gps.Masterpiece.Step.By.Step.Using.Esp32..2024.part3.rar
juohh.Craft.Gps.Masterpiece.Step.By.Step.Using.Esp32..2024.part1.rar
juohh.Craft.Gps.Masterpiece.Step.By.Step.Using.Esp32..2024.part2.rar
NitroFlare
juohh.Craft.Gps.Masterpiece.Step.By.Step.Using.Esp32..2024.part2.rar
juohh.Craft.Gps.Masterpiece.Step.By.Step.Using.Esp32..2024.part3.rar
juohh.Craft.Gps.Masterpiece.Step.By.Step.Using.Esp32..2024.part1.rar
Fikper
juohh.Craft.Gps.Masterpiece.Step.By.Step.Using.Esp32..2024.part2.rar.html
juohh.Craft.Gps.Masterpiece.Step.By.Step.Using.Esp32..2024.part3.rar.html
juohh.Craft.Gps.Masterpiece.Step.By.Step.Using.Esp32..2024.part1.rar.htmlNo Password - Links are InterchangeableComments
New full version warez downloads
Archived warez downloads
April 2025 (2256)
March 2025 (4721)
February 2025 (1900)
January 2025 (2316)
December 2024 (3717)
November 2024 (6839)
Friends
All rights by WarezCrackFull.com 2024 Sitemap